As summer winds down and the school year approaches, families across the country begin their back-to-school preparations. This time of year is not just about shopping for new clothes and school supplies; it also presents an opportunity to create delightful treats that make the transition back to the classroom a bit sweeter. One of the best ways to celebrate this occasion is by baking special goodies that can be packed into lunchboxes or enjoyed as after-school snacks. Enter the “Mini Back To School Cookies” – a simple, fun, and delicious recipe that is perfect for kids and parents alike.
Baking with children can be a joyous experience, fostering creativity and bonding while also teaching valuable skills in the kitchen. The Mini Back To School Cookies not only provide a delicious treat but also allow for a collaborative and enjoyable baking session. With vibrant colors and a satisfying taste, these cookies will surely become a cherished addition to your family’s back-to-school traditions.
The Inspiration Behind Mini Back To School Cookies
The tradition of preparing special treats for the return to school is one that resonates with many families. Back-to-school cookies serve as a delightful way to mark the end of summer and the beginning of a new academic year. They embody the spirit of celebration and nostalgia, evoking memories of childhood and the excitement of starting a new school year. For many, the scent of freshly baked cookies recalls afternoons spent in the kitchen with loved ones, creating sweet memories that last a lifetime.
These Mini Back To School Cookies are inspired by the idea of making the return to school a festive occasion. They capture the essence of childhood joy, with their playful mix of mini chocolate chips and colorful sprinkles that catch the eye and tantalize the taste buds. Each bite is a reminder of the fun times ahead, encouraging kids to embrace their new adventures in the classroom with enthusiasm.
Ingredients Breakdown
Before diving into the baking process, it’s essential to understand the key ingredients that come together to create these delightful cookies. Each component plays a crucial role in achieving the perfect texture and flavor.
All-Purpose Flour
All-purpose flour is the foundation of any cookie recipe, providing structure and stability. It contributes to the cookie’s overall texture, allowing it to hold its shape while still remaining soft and chewy on the inside. When measuring flour, it’s important to spoon it into the measuring cup and level it off for accurate results.
Baking Soda and Salt
Baking soda is a leavening agent that helps cookies rise and attain a light, airy texture. It reacts with acidic ingredients to create carbon dioxide bubbles, which contribute to the cookie’s fluffy appearance. Salt, on the other hand, enhances the overall flavor, balancing the sweetness and bringing out the richness of the other ingredients.
Unsalted Butter
When it comes to baking, unsalted butter is often preferred due to its ability to control the salt content in recipes. The fat in butter contributes to the richness and tenderness of cookies, while also helping to create a desirable texture. Be sure to use softened butter for easy mixing and optimal incorporation with the other ingredients.
Sugars (Brown and Granulated)
A combination of brown sugar and granulated sugar is used in this recipe to create a perfect balance of flavor and texture. Brown sugar, with its molasses content, adds moisture and a hint of caramel flavor, while granulated sugar contributes to the cookie’s crisp edges. Together, they create a delightful contrast that makes each bite irresistible.
Vanilla Extract
Vanilla extract is a key ingredient that enhances the flavor profile of the cookies. Its warm, sweet aroma elevates the overall taste, making the cookies more enjoyable. Opting for pure vanilla extract over imitation will provide a richer flavor.
Egg
An egg serves as a binding agent in the cookie dough, helping to hold all the ingredients together while adding moisture. It also contributes to the cookie’s chewy texture, making each bite satisfying.
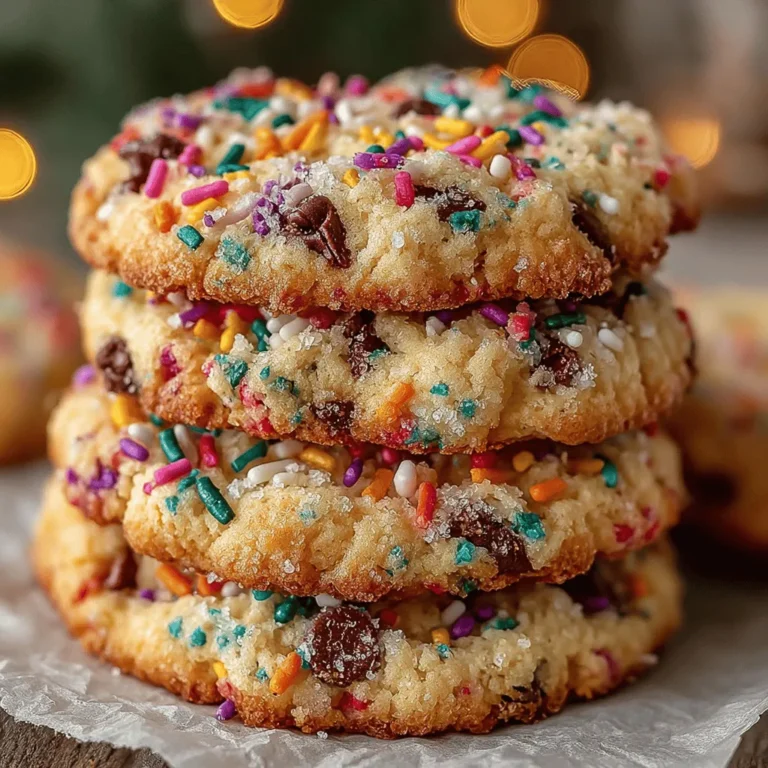
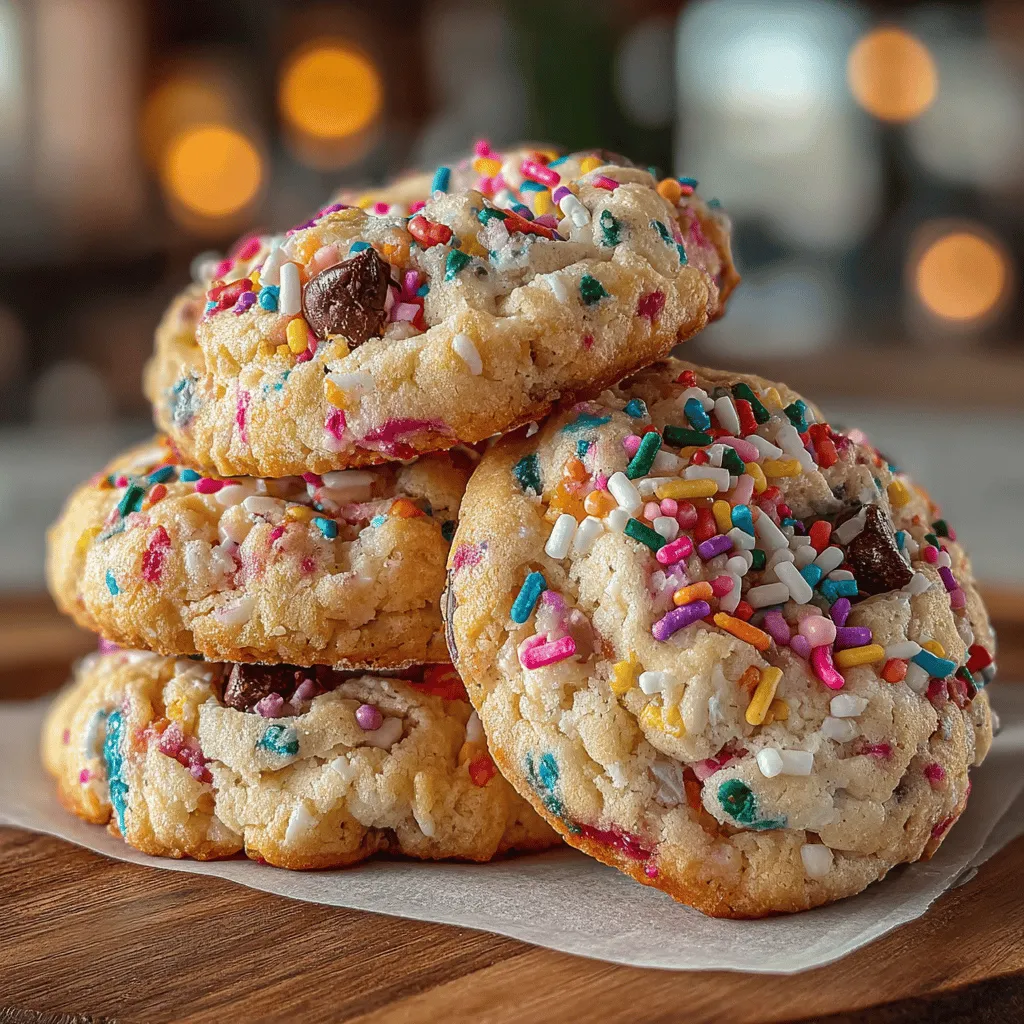
Mini Chocolate Chips and Colorful Sprinkles
To add a fun twist, mini chocolate chips and colorful sprinkles are mixed into the dough. The mini chocolate chips provide bursts of sweetness, while the sprinkles introduce a playful visual element that appeals to kids. These ingredients not only enhance the flavor but also make the cookies a festive treat that’s perfect for back-to-school celebrations.
Optional Ingredients (Oats and Cinnamon)
For those seeking to add a bit more texture and flavor, oats and cinnamon can be incorporated into the recipe. Oats provide a hearty chewiness that complements the soft cookie base, while cinnamon adds a warm, comforting spice that elevates the overall taste experience.
Step-by-Step Instructions for Perfect Cookies
Now that you’re familiar with the essential ingredients, it’s time to prepare the kitchen for baking these delightful Mini Back To School Cookies. Here’s a detailed guide on how to get started:
Prepping the Kitchen: Essential Tools and Equipment Needed
Before you begin baking, gather the necessary tools and equipment to ensure a smooth process. Here’s what you’ll need:
– Mixing bowls: A large bowl for mixing the wet ingredients and a separate bowl for the dry ingredients.
– Measuring cups and spoons: Accurate measurements are critical for the success of your cookies.
– Baking sheet: A standard-sized baking sheet will work perfectly for baking multiple cookies at once.
– Parchment paper: Lining your baking sheet with parchment paper prevents sticking and makes for easy cleanup.
– Whisk and spatula: A whisk will help you mix the dry ingredients, while a spatula is perfect for combining everything together.
– Cookie scoop or spoon: For uniform cookies, a cookie scoop is an excellent tool, but a spoon will work just as well.
With all your ingredients and tools ready, you’re set to embark on the fun and rewarding journey of baking Mini Back To School Cookies. These initial preparations set the stage for a delightful baking experience that will culminate in a batch of cookies that are sure to please everyone. Stay tuned for the following sections, where we’ll dive deeper into the step-by-step instructions and tips for achieving cookie perfection.
Baking can be a delightful experience, especially when it involves creating mini cookies that are perfect for back-to-school treats. These Mini Back To School Cookies are not only fun to make but also a fantastic way to celebrate the new school year. Let’s dive into the detailed steps to create these delicious cookies and explore some creative serving suggestions, nutritional information, and the joy of baking with kids.
Step 1: Preheat the Oven and Prepare Baking Sheets
To start off, preheat your oven to 350°F (175°C). This step is crucial as it ensures that your cookies bake evenly and achieve that perfect golden-brown color. While the oven is heating up, line your baking sheets with parchment paper. This will prevent sticking and make clean-up easier. If you don’t have parchment paper, greasing the baking sheets with a light layer of cooking spray or butter will work just fine.
Step 2: Combining Dry Ingredients for Balance
In a medium-sized bowl, whisk together the dry ingredients: 1 ½ cups of all-purpose flour, ½ teaspoon of baking soda, and ¼ teaspoon of salt. It’s important to mix these well to ensure that the baking soda and salt are evenly distributed throughout the flour. This step not only helps with even rising but also prevents any clumps of baking soda from affecting the texture of your cookies.
Step 3: Creaming Butter and Sugars for the Ideal Texture
In a large mixing bowl, combine ½ cup (1 stick) of softened unsalted butter with ¼ cup of granulated sugar and ½ cup of packed brown sugar. Using an electric mixer, beat these together on medium speed until the mixture becomes light and fluffy, typically about 2-3 minutes. This process is essential as it incorporates air into the butter, resulting in cookies that are soft and tender. The different sugars also add depth to the flavor and contribute to a chewy texture.
Step 4: Incorporating Egg and Vanilla for Richness
Next, add one large egg and 1 teaspoon of pure vanilla extract to the creamed butter and sugars. Beat this mixture until fully combined. The egg adds moisture and richness to the cookies, while the vanilla enhances the overall flavor, making your cookies smell and taste incredible. Be sure not to overmix at this stage; just blend until the egg and vanilla are well incorporated.
Step 5: Mixing Dry and Wet Ingredients Carefully to Avoid Overmixing
Now it’s time to combine the dry ingredients with the wet ingredients. Gradually add the dry mixture to the wet ingredients in the bowl. Using a spatula or a wooden spoon, gently fold the dry ingredients into the wet mixture until just combined. It’s crucial to avoid overmixing at this step, as doing so can lead to tough cookies. The goal is to mix until you no longer see any flour pockets, but the batter should still be somewhat lumpy.
Step 6: Folding in Chocolate Chips, Sprinkles, and Optional Ingredients
Once your dough is mixed, it’s time to make it fun and colorful! Gently fold in 1 cup of semi-sweet chocolate chips and ½ cup of colorful sprinkles. You can also add optional ingredients like chopped nuts or dried fruit if desired. This is where you can get creative; feel free to experiment with different types of chocolate (like dark or white chocolate) or even flavored sprinkles to match specific themes or preferences.
Step 7: Properly Scooping and Spacing the Dough on Baking Sheets
Using a cookie scoop or a tablespoon, scoop out small portions of dough and place them on the prepared baking sheets, leaving about 2 inches of space between each cookie. This spacing is important as it allows the cookies to spread during baking without merging into one another. The size of each scoop will determine the final size of your cookies, so aim for small, bite-sized portions.
Step 8: Baking Times and Tips for Achieving the Perfect Cookie
Place the baking sheets in the preheated oven and bake for 10-12 minutes, or until the edges are lightly golden. The centers may look a bit underbaked, but they will continue to cook on the baking sheet once removed from the oven, creating that perfect soft and chewy texture. Keep an eye on your cookies towards the end of the baking time to prevent overcooking, which can lead to dry cookies.
Step 9: Cooling Techniques for Optimal Texture
After baking, remove the cookies from the oven and allow them to cool on the baking sheets for about 5 minutes. This resting time is crucial as it helps them set. After 5 minutes, carefully transfer the cookies to a wire rack to cool completely. This will prevent them from becoming soggy and will help maintain their chewy texture.
The Joy of Baking with Kids
Baking is not just about creating delicious treats; it’s also an opportunity to bond with your children. Involving kids in the baking process can teach them valuable life skills while also nurturing their creativity. Here are a few benefits of baking with kids:
– Learning Basic Cooking Skills: Kids can learn about measuring, mixing, and following instructions, laying the groundwork for future culinary endeavors.
– Enhancing Math and Science Skills: Baking involves math through measuring ingredients and science through understanding how different elements affect the baking process.
– Creating Lasting Memories: The kitchen can be a place of joy and laughter, as children learn and create alongside their parents.
To make the baking process fun for kids, consider assigning them specific tasks based on their age. Younger children can mix ingredients and decorate cookies, while older kids can take on measuring and scooping duties. Encourage them to express their creativity through adding different toppings or experimenting with flavors.
Serving Suggestions and Variations
Once your Mini Back To School Cookies are baked and cooled, it’s time to think about presentation and serving. Here are some creative ways to present and serve these delightful cookies:
– Lunch Box Treats: Pack a few cookies in your child’s lunch box alongside fresh fruit or yogurt for a well-rounded meal.
– Cookie Sandwiches: Spread a layer of cream cheese frosting or peanut butter between two cookies to create a delicious cookie sandwich.
– Themed Cookie Platters: Arrange the cookies on a colorful platter and decorate with themed items (like small school-themed decor) for a fun back-to-school celebration.
– Pairing with Milk: Serve the cookies with a glass of milk or a dairy-free alternative, creating a classic snack that kids love.
Variations of these cookies can include using different types of sprinkles, such as seasonal colors for holidays or themed events. You can also switch up the chocolate chips for butterscotch, white chocolate, or even caramel bits to create unique flavor profiles.
Nutritional Information
These Mini Back To School Cookies are not only delicious but can also fit into a balanced diet. Each cookie contains approximately 100 calories, depending on the size and specific ingredients used. They provide a small dose of carbohydrates for energy, and a bit of fat from the butter and chocolate chips.
While indulging in sweet treats is always enjoyable, moderation is key. Encouraging children to enjoy these cookies as part of a balanced meal will help them develop healthy eating habits. Pairing your cookies with fruit or yogurt can create a more nutritious snack option, helping to satisfy their sweet tooth without compromising their overall diet.
Conclusion
Baking Mini Back To School Cookies is not just about creating tasty snacks; it’s about embracing the joy of cooking and creating lasting memories with your family. These cookies are simple to make, fun to decorate, and provide a sweet way to celebrate the return to school. So gather your ingredients, invite your kids into the kitchen, and start baking. You’ll not only enjoy delicious cookies but also create moments that will be cherished for years to come. Sweet treats like these cookies play an important role in celebrating milestones, and they’re sure to bring smiles to faces as the school year begins. Happy baking!
