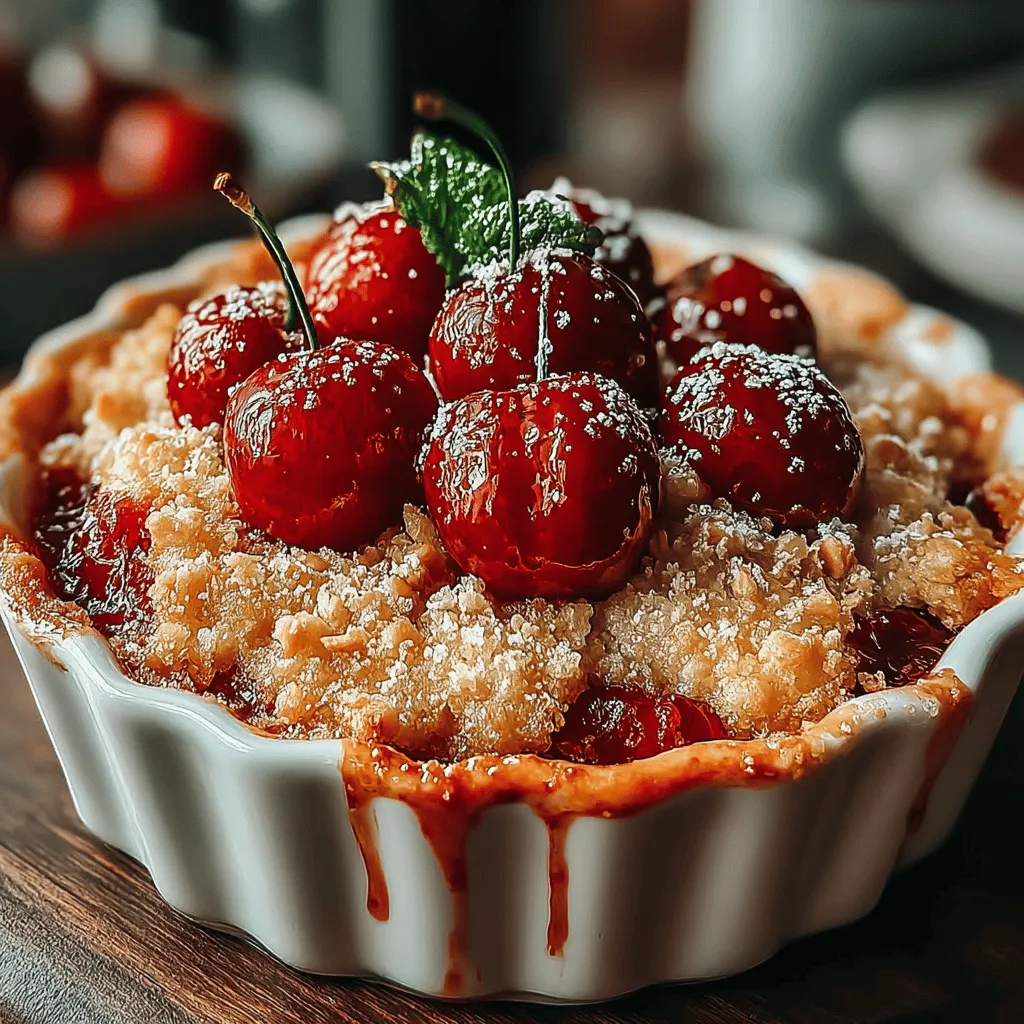
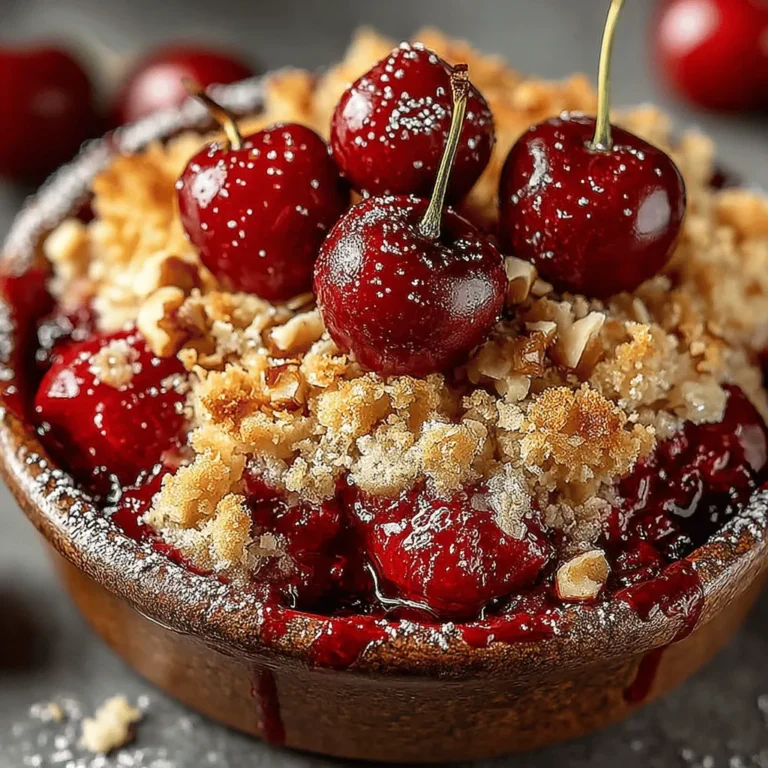
Zesty Cherry Crisp: A Delightful Dessert Recipe
When it comes to dessert, few dishes embody the comforting charm of a warm fruit crisp. Among these, cherry crisp stands out for its unique balance of flavors and textures. The tartness of fresh or frozen cherries pairs harmoniously with a crunchy, golden topping, creating a delightful contrast that appeals to both the palate and the senses. This dessert not only satisfies a sweet tooth but also offers an inviting aroma that fills the kitchen, making it an ideal choice for family gatherings, potlucks, or even a simple weeknight treat.
One of the most appealing aspects of cherry crisp is its versatility. Whether you have a bounty of fresh cherries from a summer harvest or a stash of frozen cherries tucked away in your freezer, this recipe adapts beautifully to both. With just a few simple ingredients, you can elevate these cherries into a dessert that is sure to impress. This article aims to provide a comprehensive guide to making a zesty cherry crisp, ensuring that you can recreate this delightful dish in your own kitchen.
Understanding the Ingredients
Before diving into the preparation, it’s essential to have a clear understanding of the key ingredients that contribute to the luscious cherry filling and the crisp topping. Each element plays a crucial role in achieving the perfect balance of flavor and texture.
Exploring the Cherry Filling
– Fresh or Frozen Cherries: The foundation of any cherry crisp is, of course, the cherries themselves. Using fresh cherries adds a juicy sweetness and vibrant color to the dish. However, frozen cherries are a convenient and equally delicious option, especially when fresh cherries are out of season. Both varieties bring their unique flavor profiles, ensuring a delightful dessert regardless of the choice.
– Granulated Sugar: Since cherries possess a natural tartness, granulated sugar is pivotal in balancing that acidity. It helps to sweeten the filling without overpowering the inherent cherry flavor. The amount of sugar can be adjusted based on personal preference and the sweetness of the cherries used.
– Cornstarch: To achieve the ideal consistency in the filling, cornstarch is employed as a thickening agent. It helps to bind the juices released by the cherries during baking, creating a luscious, cohesive filling that clings to the topping.
– Lemon Juice and Zest: Adding a splash of lemon juice and a sprinkle of lemon zest elevates the flavor profile by introducing a zesty brightness that complements the cherries. The acidity of lemon juice enhances the overall taste, making the dish even more refreshing.
– Vanilla Extract: A splash of vanilla extract is a must, as it adds an aromatic depth to the filling. This subtle flavor enhances the overall experience, making each bite more complex and satisfying.
– Salt: While it may seem counterintuitive to add salt to a dessert, a pinch of salt can amplify the sweetness of the cherries and round out the flavors, making the dessert more balanced.
Decoding the Crisp Topping
The topping is just as important as the filling, providing that signature crunchy texture that contrasts beautifully with the tender cherries beneath.
– Rolled Oats: One of the key components of the crisp topping, rolled oats provide a chewy texture and a nutty flavor. They also absorb moisture during baking, helping to create a delightful crunch.
– All-Purpose Flour: This ingredient acts as a binder for the topping. It helps to create a crumbly texture, ensuring that the topping holds together while still being easy to crumble over the cherry filling.
– Brown Sugar: Brown sugar adds sweetness and a hint of caramel flavor to the topping. Its moisture content contributes to a rich color and a deeper flavor compared to granulated sugar, enhancing the overall taste of the crisp.
– Ground Cinnamon: A dash of ground cinnamon introduces a warm, aromatic element that complements the cherries perfectly. Its warming notes make the dessert feel cozy and inviting.
– Melted Butter: The addition of melted butter is crucial for achieving that desired crumbly texture. It coats the dry ingredients, allowing them to clump together while still remaining light and crisp after baking.
– Optional Nuts: For those who enjoy a bit of extra crunch, adding chopped walnuts or pecans can elevate the topping even further. Not only do they contribute a satisfying texture, but they also add a nutty flavor that pairs well with the sweetness of the cherries.
Step-by-Step Instructions
Prepping for Success
Before you begin assembling your zesty cherry crisp, it’s important to set the stage for a successful baking experience. The first step is preheating your oven to ensure even baking throughout the dish. A properly preheated oven allows the crisp topping to brown beautifully while the cherry filling bubbles up perfectly beneath it.
By taking the time to understand each ingredient and preparing your workspace, you’ll be well on your way to creating a delicious zesty cherry crisp that will have everyone asking for seconds. In the next sections, we will delve into the precise steps for preparing the cherry filling and the crisp topping, ensuring that your dessert turns out perfectly every time.

Tips for Preparing the Baking Dish
Before you dive into creating your zesty cherry crisp, it’s essential to prepare your baking dish properly. A 9×13-inch baking dish works beautifully for this recipe, but if you prefer smaller servings, you can use individual ramekins or a smaller dish. Here are some tips to ensure your crisp comes out perfectly:
– Greasing the Dish: Lightly grease your baking dish with butter or cooking spray. This helps prevent the cherry filling from sticking and makes for easier cleanup.
– Choosing the Right Material: Glass or ceramic dishes are preferred as they distribute heat evenly, ensuring a well-cooked crisp. Avoid using aluminum as it can react with the acidity in cherries, affecting the flavor.
– Preheating the Oven: Always preheat your oven to 350°F (175°C) while preparing your ingredients. This ensures a consistent baking environment for your crisp.
Creating the Cherry Filling
The cherry filling is the star of this dessert, and crafting it perfectly is key to a delightful experience.
Detailed Steps on Mixing Ingredients for the Filling
1. Choosing Your Cherries: Fresh or frozen cherries work well for this recipe. If using fresh cherries, wash, pit, and halve them. If using frozen, allow them to thaw and drain excess liquid.
2. Mixing the Ingredients: In a large mixing bowl, combine the cherries with the following ingredients:
– 1 cup of granulated sugar (adjust according to the sweetness of your cherries)
– 2 tablespoons of cornstarch (this will help thicken the filling)
– 1 tablespoon of lemon juice (to enhance the cherry flavor)
– 1 teaspoon of vanilla extract (for depth of flavor)
– A pinch of salt (to balance the sweetness)
3. Coating the Cherries: Gently toss the cherries with the sugar mixture until they are evenly coated. This step is crucial for maximizing flavor. If your cherries are not well-coated, they may not achieve the desired sweetness and texture in the final dish.
Ensuring Cherries are Well-Coated for Optimal Flavor
After mixing, let the cherry filling sit for about 10-15 minutes. This resting period allows the cherries to release some of their juices, which will combine with the sugar and cornstarch to create a delicious syrup when baked. Stir once more before pouring the mixture into the prepared baking dish.
Crafting the Crisp Topping
The crisp topping adds a delightful crunch to the soft cherry filling, making it a perfect contrast of textures. Follow these steps for an irresistible topping.
Instructions for Mixing Dry Ingredients and Integrating Melted Butter
1. Gather Your Ingredients: In a medium bowl, combine:
– 1 cup of rolled oats
– 1 cup of all-purpose flour (or a gluten-free alternative)
– 3/4 cup of packed brown sugar
– 1/2 teaspoon of ground cinnamon
– 1/4 teaspoon of salt
2. Mixing the Dry Ingredients: Whisk together the oats, flour, brown sugar, cinnamon, and salt until well combined. The cinnamon will add warmth and depth to the topping.
3. Incorporating Butter: Melt 1/2 cup of unsalted butter and pour it into the dry mixture. Using a fork or your hands, mix until the topping is crumbly and well-combined. You want to achieve a texture that resembles wet sand, with some larger clumps for added crunch.
Visual Cues for Achieving the Right Crumbly Texture
The right texture for the crisp topping is essential. If it feels too dry, add a little more melted butter. If it’s too wet, mix in a bit more flour. The goal is to have it crumbly but cohesive enough to hold together when pressed slightly.
Assembling and Baking
Now it’s time to bring everything together and create your zesty cherry crisp masterpiece.
Step-by-Step Guide to Layering the Topping on the Cherry Filling
1. Layering the Filling: Pour the cherry filling evenly into the bottom of your prepared baking dish. Spread it out to ensure even coverage.
2. Adding the Topping: Evenly distribute the crisp topping over the cherry filling. Use your hands to crumble it over the cherries, ensuring that the filling is mostly covered. This will allow for a nice, crispy top once baked.
Baking Time and Temperature Considerations for Perfect Results
Place the assembled dish in your preheated oven and bake for 35-40 minutes. You’ll know it’s done when the topping is golden brown and the cherry filling is bubbling around the edges. If the topping is browning too quickly, you can cover it loosely with aluminum foil for the last 10-15 minutes of baking.
Cooling and Serving Suggestions
Once your zesty cherry crisp is out of the oven, it’s important to let it cool before serving.
Importance of Letting the Crisp Cool Before Serving
Allowing the crisp to cool for at least 10-15 minutes will help the filling set, making it easier to scoop and serve. If you serve it immediately, the filling may be too runny.
Suggestions for Serving with Ice Cream or Whipped Cream for Added Indulgence
For an indulgent experience, serve your warm cherry crisp with a scoop of vanilla ice cream or a dollop of whipped cream. The creaminess pairs beautifully with the tart cherries and crunchy topping, creating a delicious contrast that elevates the dessert.
Nutritional Information
While desserts are often seen as indulgences, this zesty cherry crisp incorporates fruits and oats that offer nutritional benefits.
Overview of Calories and Nutritional Benefits of Cherries
Cherries are not only delicious but are also low in calories, with about 50 calories per cup. They are packed with antioxidants, vitamins A and C, and are known for their anti-inflammatory properties.
Discuss the Health Aspects of Oats and Nuts
The oats in the crisp add fiber, which is beneficial for digestion and can help keep you full longer. If you choose to add nuts, such as almonds or walnuts, they also provide healthy fats and protein, contributing to a balanced dessert experience.
Balancing Enjoyment and Nutrition in Desserts
This cherry crisp allows you to enjoy a sweet treat while still benefiting from the nutrients provided by its wholesome ingredients. It’s a great way to satisfy your sweet tooth without completely compromising on health.
Variations and Customizations
One of the best aspects of the zesty cherry crisp is its versatility. Here are some creative variations to consider:
Exploring Fruit Alternatives: Using Peaches, Blueberries, or Mixed Berries
While cherries are the star of this recipe, feel free to experiment with other fruits. Peaches, blueberries, or a mix of berries can be wonderful alternatives. Just adjust the sugar according to the sweetness of the fruit you choose.
Gluten-Free Options by Substituting Flour with Almond or Coconut Flour
For those following a gluten-free diet, substitute the all-purpose flour with almond flour or coconut flour. Keep in mind that these alternatives may alter the texture slightly, but they will still yield a delicious crisp.
Vegan Adaptations by Replacing Butter with Coconut Oil or Plant-Based Butter
If you’re looking to make this recipe vegan, simply replace the butter with an equal amount of melted coconut oil or a plant-based butter alternative. This maintains the richness of the topping while keeping it dairy-free.
Conclusion
Making zesty cherry crisp is a delightful experience that results in a warm, comforting dessert perfect for any occasion. This recipe not only showcases the bright, tart flavors of cherries but also offers flexibility to suit various dietary needs and preferences.
Whether you’re enjoying it at a summer barbecue, a cozy family dinner, or as a comforting treat on a chilly night, this cherry crisp will surely please everyone. Embrace the joy of homemade desserts, and don’t hesitate to experiment with different fruits and toppings to make it your own. Enjoy every bite of your zesty cherry crisp!


