Introduction
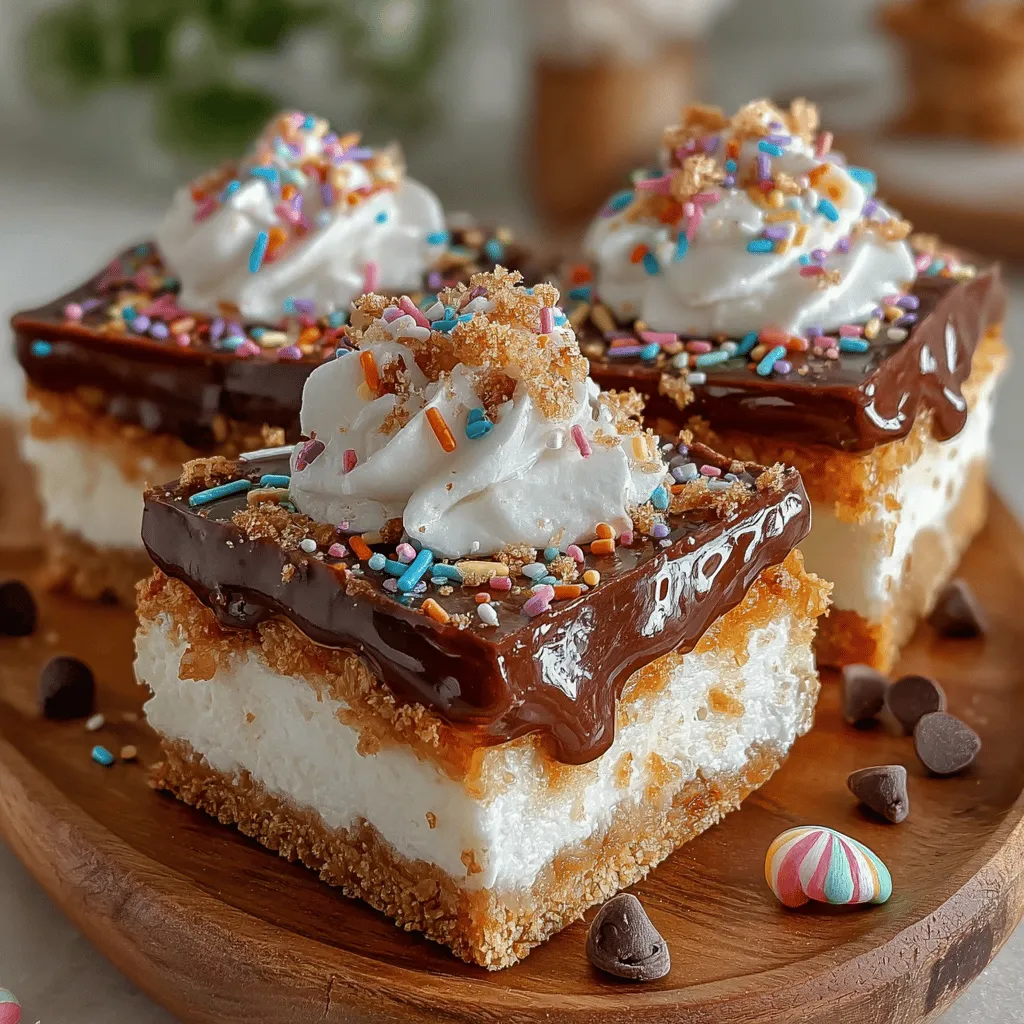
In the world of desserts, few treats evoke joy and celebration quite like a birthday cake. The mere sight of a beautifully decorated cake can ignite cherished memories of festivities filled with laughter, love, and, of course, delicious food. However, not everyone has the time or inclination to bake a traditional cake from scratch—especially when planning a party or gathering. Enter the Birthday Bliss No-Bake Cake Bars, a delightful, quick, and easy alternative that encapsulates the festive flavors of a birthday cake in a convenient and portable bar form.
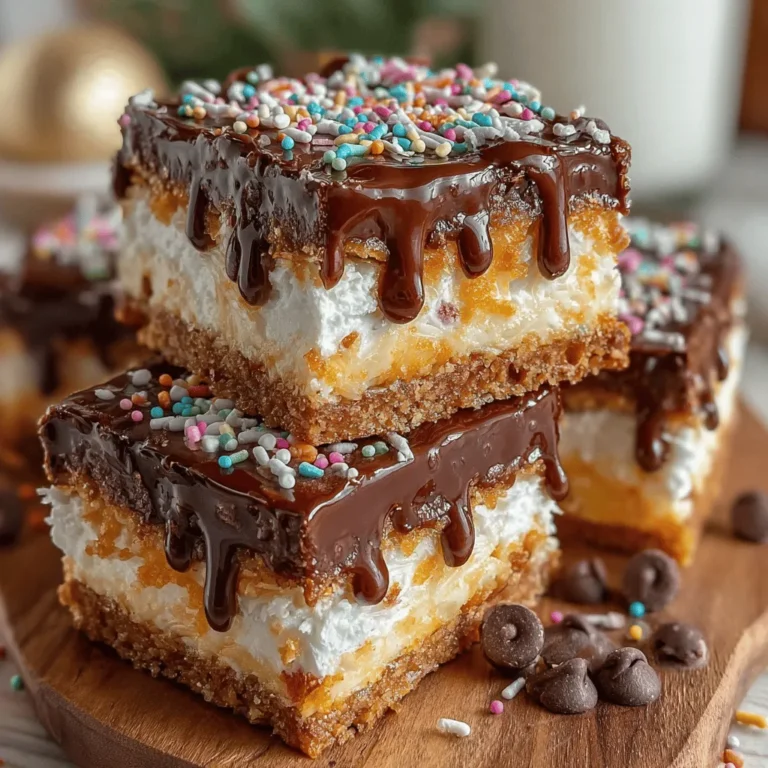
These bars are perfect for parties, gatherings, or simply satisfying your sweet tooth. They are packed with wholesome ingredients and vibrant colors, making them as appealing to the eye as they are to the palate. With a combination of textures and flavors, these no-bake cake bars offer a fun and festive dessert that everyone can enjoy, without the need for baking. Whether you’re celebrating a birthday, an anniversary, or just the joy of everyday life, these bars promise to bring a smile to your face.
Understanding the Ingredients
To create the perfect Birthday Bliss No-Bake Cake Bars, it’s essential to understand the role each ingredient plays in achieving that delightful flavor and texture. Each component has been carefully selected not just for its taste but also for its ability to contribute to the overall experience of the bars.
Graham Cracker Crumbs
At the foundation of these cake bars lies graham cracker crumbs, which serve as the base. The texture of graham crackers is ideal for creating a sturdy yet soft foundation. When crushed, they transform into fine crumbs that bind well with the other ingredients, providing a pleasant chewiness that complements the creamy filling. This base not only adds a subtle sweetness but also contributes to the bars’ overall structure, ensuring they hold together beautifully.
Shredded Coconut
Next on the list of ingredients is unsweetened shredded coconut, which adds a delightful flavor and texture to the bars. Coconut introduces a tropical twist that enhances the overall flavor profile, making each bite feel like a mini-vacation. The chewy texture of the shredded coconut contrasts nicely with the smoothness of the other components, creating a more complex mouthfeel that elevates the experience of enjoying these bars. Plus, coconut is a great source of healthy fats, making these treats a slightly more nutritious option.
Nuts for Crunch
To further enhance the texture, finely chopped nuts—such as walnuts or almonds—are incorporated into the mix. Nuts provide a satisfying crunch that balances the creamy elements of the bars. Additionally, they are packed with healthy fats, protein, and essential nutrients, which not only contribute to the nutritional value of the dessert but also help keep you feeling full longer. The nutty flavor complements the sweetness of the other ingredients, creating a well-rounded taste experience.
The Sweet Touch: Rainbow Sprinkles
No birthday treat is complete without a pop of color, and that’s where rainbow sprinkles come in. These cheerful additions not only brighten up the appearance of the bars but also enhance the celebratory vibe. As you take a bite, the sprinkles provide a slight crunch and a burst of sweetness that rounds out the flavor profile. They serve as a visual reminder of the festive occasion, making these bars perfect for any celebration.
Cocoa Powder: A Rich Flavor
To deepen the flavor profile of the bars, cocoa powder is included. This ingredient introduces a rich, chocolatey flavor that perfectly complements the sweetness of the other components. Cocoa powder also adds a touch of sophistication to the dessert, balancing out the sugary elements with its slight bitterness. This combination creates a harmonious blend of flavors that appeals to chocolate lovers and enhances the overall enjoyment of the bars.
Almond Butter and Maple Syrup
The creamy texture of the Birthday Bliss No-Bake Cake Bars is achieved through the use of almond butter and pure maple syrup. Almond butter serves as a natural binder, holding the ingredients together while providing healthy fats and protein. Its nutty flavor is a perfect match for the other ingredients, enhancing the overall taste. Meanwhile, pure maple syrup acts as a natural sweetener, contributing to the bars’ delightful sweetness without the need for refined sugars. The combination of almond butter and maple syrup ensures that the bars are not only delicious but also a healthier option compared to traditional desserts.
Vanilla Extract and Sea Salt
To enhance the flavor even further, a hint of vanilla extract is added. Vanilla elevates the sweetness and adds depth to the overall flavor profile, making the bars even more indulgent. On the other hand, a pinch of sea salt is crucial for balancing the sweetness. Salt helps to round out the flavors, ensuring that no single ingredient overpowers another. This delicate balance is key to creating a well-rounded dessert that sings with flavor.
Chocolate Chips: The Finishing Touch
Finally, the addition of dairy-free chocolate chips brings the Birthday Bliss No-Bake Cake Bars to a whole new level. These chocolate chips offer a rich chocolatey element that ties all the flavors together beautifully. For those with dietary restrictions, dairy-free options are readily available, making these bars accessible to a wider audience. The melting chocolate chips create a luscious experience with every bite, adding both sweetness and a creamy texture that enhances the overall enjoyment of the bars.
Step-by-Step Instructions for Success
Creating the Birthday Bliss No-Bake Cake Bars is a straightforward process, but a few key steps will ensure your success. By following these detailed instructions, you can achieve bars that are not only delicious but also visually appealing and satisfying.
Preparing the Pan for Easy Removal
To start, it’s essential to prepare your baking dish properly. Use an 8×8 inch or 9×9 inch square pan for optimal results. Begin by lining the bottom and sides of the pan with parchment paper, leaving some overhang on the sides. This overhang will act as handles, making it easier to lift the bars out of the pan once they are set. Be sure to press the parchment paper firmly against the sides to avoid any air bubbles, ensuring a smooth surface for your bars.
Mixing Dry Ingredients
Next, it’s time to mix the dry ingredients. In a large bowl, combine the graham cracker crumbs, shredded coconut, finely chopped nuts, cocoa powder, and rainbow sprinkles. Use a whisk to thoroughly mix these ingredients together, ensuring an even distribution of flavors and textures. This step is crucial, as it sets the foundation for the bars and guarantees that every bite will be flavorful and satisfying.
Blending the Wet Ingredients
In a separate bowl, blend the wet ingredients, which include almond butter, maple syrup, vanilla extract, and a pinch of sea salt. Use a whisk or spatula to mix these ingredients until smooth and creamy. The goal is to create a cohesive mixture that will bind the dry ingredients together when combined. Once the wet ingredients are well-blended, gradually pour them into the bowl of dry ingredients, stirring continuously until everything is combined thoroughly.
With your ingredients ready and combined, you are well on your way to creating the Birthday Bliss No-Bake Cake Bars. The next steps will involve pressing the mixture into the prepared pan and allowing it to set, resulting in a treat that’s sure to please everyone. Stay tuned for the next part, where we’ll cover the final steps to complete this delightful dessert.

Creating the perfect Birthday Bliss No-Bake Cake Bars is not only about selecting the right ingredients but also about mastering the art of mixing and assembling to achieve a delightful treat. Let’s dive into the essential steps to ensure your bars turn out perfectly every time.
Achieving the Right Consistency When Mixing the Wet Ingredients
The key to a successful no-bake cake bar lies in how you handle the wet ingredients. Start by measuring your nut butter and sweetener accurately. If you’re using a natural nut butter, ensure it is at room temperature to help it mix easily. For sweeteners like maple syrup or agave, a little warming can also aid in achieving a smoother blend.
1. Mixing Technique: Use a large mixing bowl and a sturdy spatula or wooden spoon. Begin by combining the nut butter and sweetener until you have a creamy consistency. This should take about 2-3 minutes of vigorous stirring to incorporate air, which will help give your bars a light texture.
2. Add Flavorings: Once combined, add in your vanilla extract and any additional flavorings like almond extract or a pinch of salt. This step is crucial, as it enhances the overall flavor profile of your bars.
Combining Wet and Dry Mixtures
After achieving the perfect consistency with your wet ingredients, it’s time to combine them with the dry mixture. This is where the magic happens.
1. Gradual Mixing: Pour the dry ingredients, which typically include oats, flour, and any protein powder, into the bowl with the wet mixture. Rather than dumping everything in at once, add the dry ingredients gradually. This ensures a more even distribution and prevents clumping.
2. Stirring Method: Use a folding technique to combine the mixtures. Begin by scooping from the bottom of the bowl and folding it over the top. Rotate the bowl as you go to ensure all ingredients are well incorporated. The mixture should be thick and sticky, resembling cookie dough.
Incorporating Chocolate Chips
Chocolate chips are the finishing touch that elevates your no-bake bars. Here’s how to incorporate them without breaking them:
1. Choose High-Quality Chips: Opt for semi-sweet or dark chocolate chips for a rich flavor. If you prefer a healthier option, consider using dairy-free chips.
2. Folding Technique: Once your mixture is combined, gently fold in the chocolate chips using the same folding method as before. Be careful not to over-mix, as this can cause the chips to break apart. Aim to have a few chips visible on top for that appealing look.
Pressing the Mixture into the Pan
To create well-formed bars, the way you press the mixture into the pan is crucial.
1. Lining the Pan: Line an 8×8-inch square baking pan with parchment paper, allowing for some overhang. This will make it easier to lift your bars out later.
2. Even Pressing: Transfer the mixture into the prepared pan. Use a flat spatula or your hands (dampened slightly to prevent sticking) to press the mixture evenly into the corners. Ensure it is compact, as this will help the bars hold their shape once chilled. Aim for a thickness of about 1 inch for the bars.
Chilling the Bars to Set
Chilling is a vital step that influences the texture and firmness of your Birthday Bliss No-Bake Cake Bars.
1. Refrigeration Time: Cover the pan with plastic wrap or foil and place it in the refrigerator for at least 2 hours. This allows the bars to firm up, making them easier to cut.
2. Testing for Firmness: After chilling, check the bars by gently pressing the center with your finger. They should feel set but slightly springy. If they’re too soft, allow them to chill longer.
Cutting and Serving
Once your bars are set, it’s time to cut and serve them.
1. Slicing Technique: Use a sharp knife to cut the bars. For clean cuts, wipe the knife with a damp cloth between slices. This prevents the mixture from sticking and ensures neat edges.
2. Serving Suggestions: Serve the bars as is, or dust with a little cocoa powder or powdered sugar for an elegant touch. You can also drizzle melted chocolate on top for an added layer of indulgence.
Nutritional Benefits of Birthday Bliss No-Bake Cake Bars
These bars not only satisfy your sweet tooth but also offer several nutritional benefits, making them a smart choice for dessert.
Whole Ingredients for Wholesome Enjoyment
The Birthday Bliss No-Bake Cake Bars are made with whole ingredients that provide a variety of health benefits:
– Healthy Fats: Nut butters are rich in healthy fats that promote heart health and keep you satiated.
– Natural Sweeteners: Sweeteners like maple syrup provide sweetness without the refined sugars found in many commercial desserts, offering additional minerals and nutrients.
– Fiber-Rich: Oats and any added seeds contribute significantly to your daily fiber intake, aiding in digestion and promoting a feeling of fullness.
Customizable for Dietary Needs
These bars are incredibly versatile and can be customized to fit various dietary preferences:
– Vegan Option: Simply use plant-based nut butters and vegan chocolate chips.
– Gluten-Free Option: Ensure that your oats and any flour used are certified gluten-free.
This adaptability means that everyone can enjoy these delicious treats regardless of dietary restrictions.
Creative Serving Suggestions
The Birthday Bliss No-Bake Cake Bars are perfect for a variety of occasions.
Perfect for Celebrations
Beyond birthdays, these bars can be a delightful addition to many celebrations. They are great for:
– Holidays: Make them festive by using seasonal flavors or colors.
– Casual Get-Togethers: Serve them at picnics, potlucks, or as a simple dessert for family gatherings.
These versatile bars can easily become a staple at any event, providing a sweet finish to any meal.
Pairing with Beverages
To enhance the enjoyment of these bars, consider pairing them with complementary beverages:
– Herbal Teas: A warm cup of chamomile or peppermint tea can balance the sweetness of the bars beautifully.
– Plant-Based Milks: Almond or oat milk offers a creamy contrast that complements the chocolatey goodness of the bars.
Storage and Shelf Life
Proper storage will ensure your Birthday Bliss No-Bake Cake Bars remain fresh and delicious.
1. Storage Method: Keep the bars in an airtight container in the refrigerator. For longer shelf life, you can also freeze them—just make sure to separate layers with parchment paper to prevent sticking.
2. Shelf Life: When stored in the refrigerator, these bars can last up to one week. If frozen, they can maintain their quality for up to three months.
Conclusion
In conclusion, the Birthday Bliss No-Bake Cake Bars are not just a simple dessert; they are a celebration of flavors and textures that can brighten any occasion. With their ease of preparation, delightful taste, and nutritional benefits, these bars are sure to become a favorite in your recipe repertoire. Whether for a birthday bash or a spontaneous treat, these bars embody the joy of dessert without the fuss of baking, making them a perfect choice for anyone looking to satisfy their sweet cravings effortlessly. Enjoy making, sharing, and devouring these bars, and watch as they become the highlight of your next gathering!


