Indulgent Dreams: A Decadent Chocolate Peanut Butter Treat
Introduction
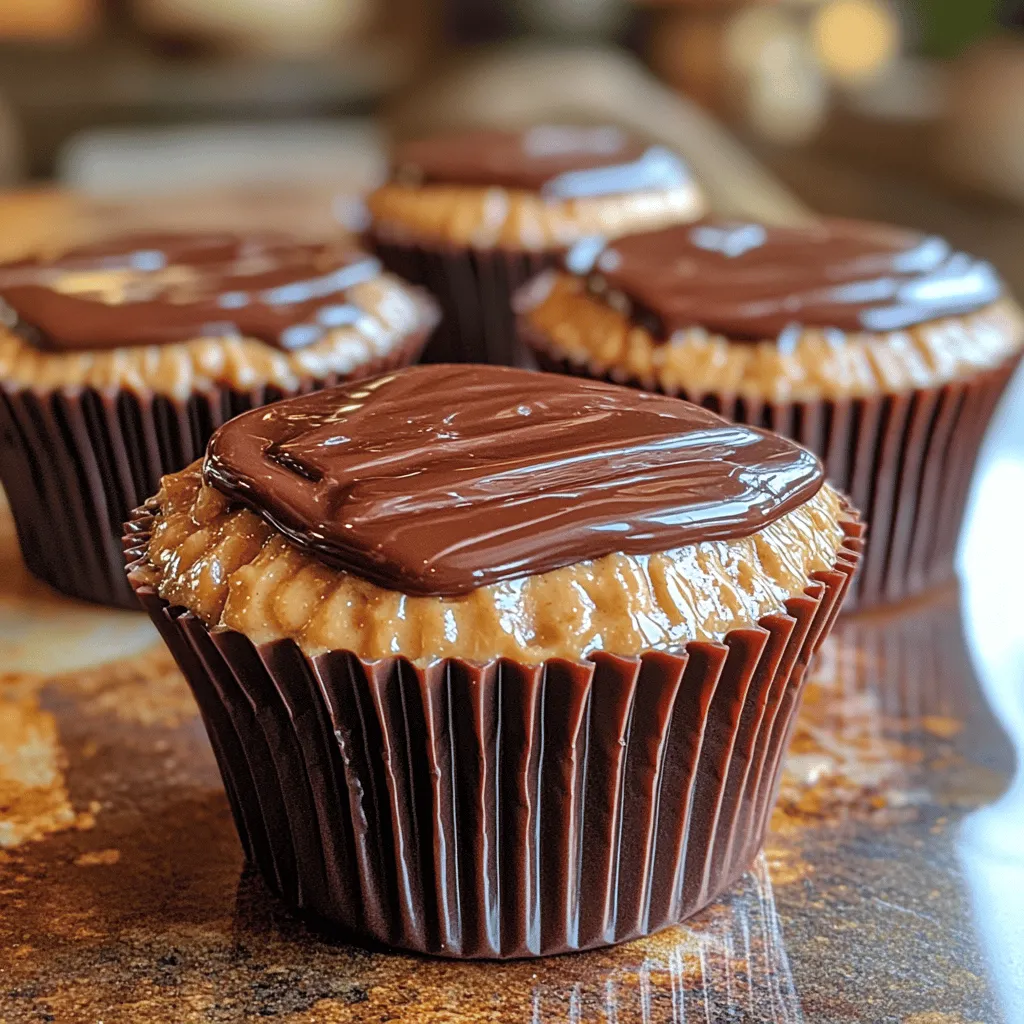
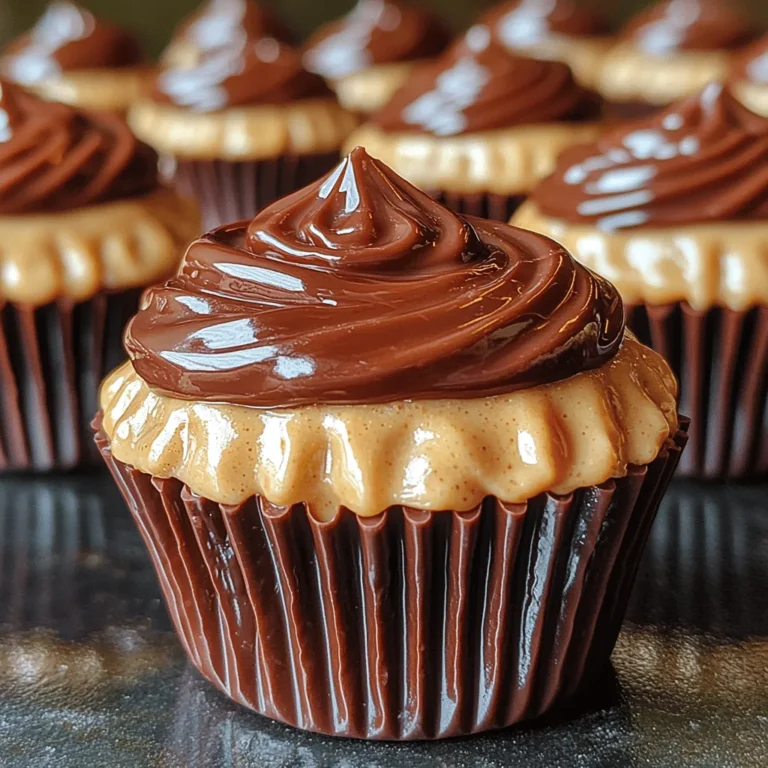
Indulge in a delightful fusion of flavors with our Indulgent Dreams recipe, a delectable treat that perfectly marries the creamy richness of peanut butter with the deep, satisfying taste of semi-sweet chocolate. This dessert is not only a feast for the taste buds but also a visual delight, making it an ideal choice for parties, special occasions, or simply a well-deserved indulgence at home. Whether you are a chocolate enthusiast or a peanut butter aficionado, these chocolate cups are sure to become a staple in your dessert repertoire.
As we embark on this culinary journey, we will guide you through the irresistible world of Indulgent Dreams, sharing insights into why this combination is so beloved and offering you a step-by-step process to recreate this treat in your kitchen.
The Allure of Chocolate and Peanut Butter
The pairing of chocolate and peanut butter is a classic combination that has captured the hearts (and taste buds) of dessert lovers for generations. The reason behind this irresistible duo lies in the complementary flavors and textures they bring to the table. Chocolate, with its rich, decadent profile, contrasts beautifully with the nutty, slightly salty taste of peanut butter. Together, they create a harmonious balance that is both comforting and indulgent.
In recent years, chocolate cups filled with various delicious fillings have surged in popularity within the modern dessert scene. These treats have evolved from simple candy bars to gourmet creations, capturing the imagination of home bakers and professional chefs alike. The convenience of bite-sized portions and the ability to customize fillings have made chocolate cups a go-to choice for celebrations, gifts, and everyday snacking.
Moreover, peanut butter boasts its own set of nutritional benefits, making it a guilt-free indulgence when enjoyed in moderation. Packed with protein, healthy fats, and essential vitamins, peanut butter not only contributes to a satisfying treat but also adds nutritional value. This makes our Indulgent Dreams not only a decadent dessert but also a slightly healthier option compared to many other sweets.
Ingredients: What You Need for Indulgent Dreams
Before diving into the preparation of Indulgent Dreams, it’s essential to gather the right ingredients. This recipe relies on a handful of key components that work together to create the perfect balance of flavor and texture. Here’s what you’ll need:
1. Semi-Sweet Chocolate Chips: The backbone of this recipe, semi-sweet chocolate chips offer a rich chocolate flavor that complements the sweetness of peanut butter perfectly. Opting for high-quality chocolate ensures a more satisfying taste and smoother texture.
2. Creamy Peanut Butter: Choosing the right peanut butter is crucial. For this recipe, creamy peanut butter is ideal as it spreads easily and creates a smooth filling. Look for natural varieties without added sugars or oils for the best flavor.
3. Powdered Sugar: This ingredient is the secret to achieving a smooth and sweet peanut butter filling. Powdered sugar dissolves easily, providing the right amount of sweetness without graininess.
4. Vanilla Extract: A splash of vanilla extract enhances the overall flavor profile of the chocolate and peanut butter, adding a warm and aromatic note.
5. Salt: Just a pinch of salt is essential for balancing the sweetness of the chocolate and peanut butter, elevating the flavors and creating a more complex taste experience.
6. Optional Ingredients for Extra Flair:
– Milk Chocolate Chips: These can be used for drizzling on top of the cups to add an extra layer of flavor and visual appeal.
– Mini Cupcake Liners: Selecting the right size and material for your cupcake liners is important for shaping your treats. Opt for sturdy liners that can hold the melted chocolate and filling without leaking.
Preparation: Step-by-Step Guide to Crafting Indulgent Dreams
Now that you have your ingredients ready, it’s time to start the preparation process. Creating these indulgent treats is straightforward, and following these steps will ensure a successful outcome.
1. Preparing the Mold for Perfectly Shaped Cups: Begin by preparing your mini cupcake pans. Line each cup with a mini cupcake liner, ensuring that they fit snugly to avoid any spillage during the melting and filling process.
2. Importance of Mini Cupcake Liners: Mini cupcake liners not only help in shaping the chocolate cups but also make for easy serving and cleanup. They come in various colors and patterns, allowing you to customize your presentation for any occasion.
3. Tips for Properly Lining the Cupcake Pan: Make sure to press the liners down into the cups firmly to prevent them from shifting when you pour in the melted chocolate. This step is crucial for achieving uniform shapes and preventing any mess.
4. Melting the Chocolate: Techniques for Success: The next step is to melt your semi-sweet chocolate chips. You can do this using a microwave or a double boiler. If using a microwave, place the chocolate chips in a microwave-safe bowl and heat in 30-second intervals, stirring in between, until the chocolate is completely melted and smooth.
5. Safe Microwave Methods and Temperature Control: Be cautious not to overheat the chocolate, as it can burn easily. Maintaining a lower temperature and stirring frequently will help achieve a smooth consistency without the risk of scorching.
6. How to Achieve a Smooth Consistency: Once melted, stir the chocolate until it is fully combined and glossy. If you notice any lumps, a quick stir will often resolve this issue. The goal is to have a silky texture that will coat the cupcake liners evenly.
7. Coating the Liners: Ensuring a Delicious Base: Using a spoon or a small ladle, carefully pour a small amount of melted chocolate into each lined cupcake cup. Tilt the pan gently to spread the chocolate evenly across the bottom and up the sides of the liners, ensuring a thick layer that will hold the filling later.
8. Techniques for Evenly Spreading Chocolate: For an even coat, you may want to use the back of a spoon or a small spatula to spread the chocolate, making sure it reaches all edges of the liner. This step is crucial for creating a sturdy base for the peanut butter filling.
With these foundational steps, you are well on your way to creating your own Indulgent Dreams. Stay tuned as we dive deeper into the filling process and the final touches that will elevate these chocolate cups to a new level of decadence.

Setting the Chocolate in the Freezer
Before we dive into creating the perfect peanut butter filling, it’s essential to set the foundation for your chocolate cups. Once you have poured the initial layer of melted chocolate into your cups, it’s time to let them firm up. Place the chocolate-filled cups in the freezer for about 10-15 minutes. This brief chill allows the chocolate to solidify, providing a sturdy base for the creamy peanut butter filling that will soon follow.
Creating the Perfect Peanut Butter Filling
Mixing Techniques for the Ideal Texture
Achieving the perfect peanut butter filling is crucial for the success of your Indulgent Dreams. Start by using a medium-sized mixing bowl. Use a hand mixer or a whisk to combine your room temperature peanut butter and powdered sugar. These mixing techniques will help incorporate air into the mixture, creating a light and creamy texture. If you prefer a chunkier filling, you can also fold in some chopped peanuts at this stage for added crunch.
Importance of Room Temperature Ingredients
One of the most important aspects of creating a smooth peanut butter filling is ensuring that all of your ingredients are at room temperature. Cold ingredients can lead to clumping and uneven mixing, which can affect the final texture of your filling. Allow your peanut butter, butter (if using), and any other ingredients to sit out for about 30 minutes before you begin mixing. This simple step can make a significant difference in the creaminess of your filling.
Tips for Achieving a Smooth Mixture
To achieve a silky-smooth peanut butter filling, consider the following tips:
– Sift the powdered sugar: Before adding it to the peanut butter, sift the powdered sugar to eliminate any lumps.
– Use creamy peanut butter: Opt for a high-quality creamy peanut butter rather than a natural or chunky variety. This will contribute to a smoother texture.
– Blend well: Ensure that you mix the peanut butter and sugar thoroughly until there are no dry spots left. If necessary, add a splash of milk to loosen the mixture if it feels too thick.
The Flavor Profile: Enhancing Peanut Butter with Vanilla and Salt
To take your peanut butter filling to the next level, consider enhancing its flavor profile. Adding a splash of vanilla extract not only adds sweetness but also depth to the overall flavor. Additionally, a pinch of salt can help balance the sweetness from the powdered sugar and elevate the taste of the peanut butter. This combination will create a rich and satisfying filling that perfectly complements the chocolate exterior.
Assembling the Chocolate Cups: Build Your Indulgent Dreams
Filling the Cups: Perfect Portions
Once your chocolate base has set, it’s time to fill the cups with your decadent peanut butter mixture. Use a small cookie scoop or a tablespoon to portion out the peanut butter filling. Aim for about one tablespoon of filling per cup. This amount ensures that the peanut butter filling is substantial but not overflowing, allowing for a perfectly balanced treat.
How to Measure and Scoop the Peanut Butter Filling
Measuring and scooping the filling can be made easier by lightly greasing the scoop with a little oil or cooking spray. This will help the peanut butter mixture slide off more easily without sticking. If you find the filling too sticky, you can also use a silicone spatula to scrape it into the cups.
Importance of Leaving Space for the Top Layer
When filling your cups, it’s essential to leave a little space at the top of each chocolate cup. This space will allow you to pour the final layer of chocolate over the filling without it spilling over the edges. Leaving about 1/4 inch of space will ensure that each cup is neatly sealed and looks appealing when served.
Topping with Chocolate: Ensuring Complete Coverage
After you have filled all the cups with the peanut butter mixture, it’s time to add the final layer of chocolate. Melt more chocolate using the double boiler method or in the microwave, as previously described. Once melted, carefully pour the chocolate over the filled cups, ensuring that the filling is entirely covered. Use a small spatula or the back of a spoon to spread the chocolate evenly if necessary.
Techniques for Pouring and Settling the Chocolate
To achieve a smooth top, pour the melted chocolate carefully, allowing it to flow naturally into the cup. If you notice any air bubbles appearing, gently tap the pan on the counter to help them rise to the surface. This technique also ensures that the chocolate settles evenly over the filling.
Importance of Tapping the Pan
After pouring the final chocolate layer, tapping the pan on a flat surface helps distribute the chocolate evenly and eliminates air pockets. This step is crucial for achieving a beautiful, polished finish on your Indulgent Dreams.
Optional Drizzle: Adding the Finishing Touch
Melting Milk Chocolate Chips for Decoration
For an extra touch of elegance, consider adding a drizzle of melted milk chocolate on top of your chocolate cups. To do this, simply melt a small amount of milk chocolate chips using the same method as before. Once melted, let it cool slightly before using it for drizzling.
Techniques for Drizzling: Tools You Can Use
You can use several tools for drizzling the melted chocolate:
– Piping Bag: Place the melted chocolate in a piping bag, snip the end, and drizzle over the cups for precise control.
– Fork: If you don’t have a piping bag, use a fork to drizzle the chocolate. Dip the fork into the melted chocolate and quickly flick it back and forth over the cups for a more rustic look.
– Spoon: Simply use a spoon to drizzle chocolate over the tops in a zigzag pattern for a casual but appealing presentation.
Creative Ideas for Decorative Patterns
Feel free to get creative with your drizzling! Consider using white chocolate for contrast or even adding colorful sprinkles or chopped nuts on top while the chocolate is still warm for an extra layer of texture and visual appeal.
Chilling and Setting: The Final Steps
Importance of Proper Chilling Time
Once your cups are assembled and decorated, it’s crucial to allow them to chill properly. This chilling time not only helps the chocolate set but also melds the flavors together, enhancing the overall experience of your Indulgent Dreams.
How Long to Chill for Best Results
For optimal results, place your completed chocolate cups in the refrigerator for at least 30-60 minutes. If you’re short on time, you can leave them in the freezer for about 15-20 minutes. However, be cautious not to freeze them for too long, as this can lead to a change in texture.
Signs That the Cups Are Ready to Serve
You’ll know your Indulgent Dreams are ready to serve when the chocolate is firm to the touch, and the peanut butter filling has set slightly but remains soft and creamy. Gently press down on the top of a cup to check for firmness; it should not feel sticky or overly soft.
Serving Suggestions: Enjoying Indulgent Dreams
Presentation Ideas for Gatherings and Parties
When it comes to serving your Indulgent Dreams, presentation is key. Arrange the chocolate cups on a decorative platter for a stunning display. You can use mini cupcake liners for an elegant touch or place them in small mason jars for a rustic vibe. Add a few fresh berries or mint leaves around the cups to enhance the visual appeal.
Pairing Suggestions: Beverages that Complement the Treat
These chocolate cups pair beautifully with a variety of beverages. Consider serving them with a rich cup of coffee or a creamy latte for a delightful afternoon treat. Alternatively, a glass of cold milk or a sweet vanilla almond milk will provide a refreshing contrast to the rich chocolate and peanut butter flavors.
Storing Leftovers: Best Practices for Freshness
If you have any leftovers, store them in an airtight container in the refrigerator for up to a week. To maintain their freshness, ensure the container is well-sealed and keep them away from strong odors, as chocolate can easily absorb smells. For longer storage, these chocolate cups can be frozen for up to three months; just remember to thaw them in the refrigerator when you’re ready to enjoy them again.
Conclusion
Indulgent Dreams offers a blissful escape into the world of dessert, combining the rich flavors of chocolate and peanut butter into bite-sized delights. With a simple preparation process and minimal ingredients, these chocolate cups are perfect for any occasion. Whether you’re treating yourself or sharing with loved ones, this recipe promises satisfaction with every bite. Enjoy the experience of creating and savoring these indulgent treats, and let them bring joy to your dessert table.


