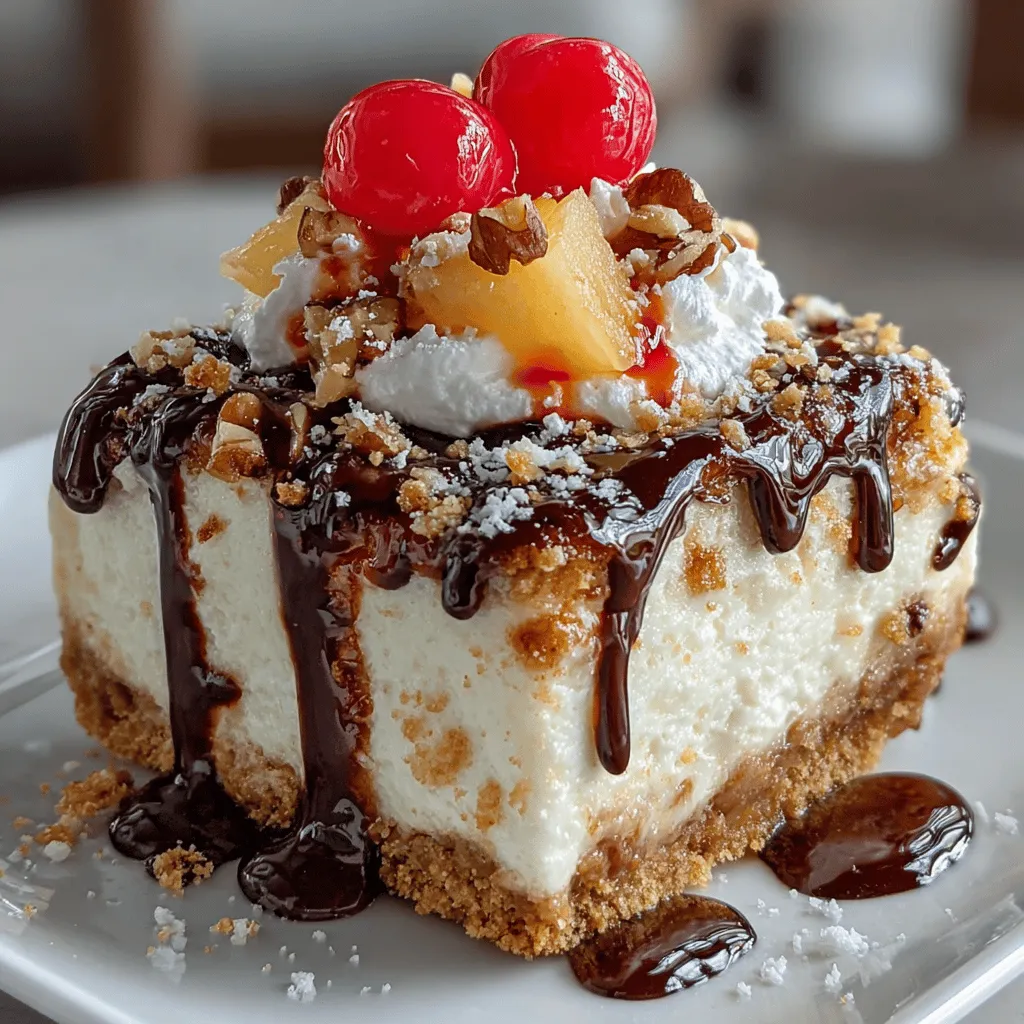
No-Bake Banana Split Cheesecake Bars: A Delightful Twist on a Classic Dessert
If you’re on the hunt for a dessert that perfectly marries the iconic flavors of a banana split with the creamy indulgence of cheesecake, look no further than No-Bake Banana Split Cheesecake Bars. This delightful treat not only captures the essence of the beloved ice cream sundae but does so in a way that is both simple and satisfying, making it an ideal choice for gatherings, family dinners, or a sweet end to a hot summer day.
No-bake desserts have surged in popularity for their convenience and ease of preparation. As temperatures rise, the last thing most of us want to do is turn on the oven, so recipes that require little more than mixing and chilling are a welcome addition to any kitchen repertoire. These cheesecake bars come together in a matter of minutes, allowing you to enjoy a delicious treat without the hassle of baking. Plus, the ingredients are straightforward and accessible, ensuring that you can whip up this dessert with minimal fuss.
The Allure of No-Bake Desserts
In recent years, no-bake desserts have become a staple in modern cooking, favored for their ability to deliver big flavors without the need for extensive time in the kitchen. Whether you’re hosting a summer barbecue, a birthday party, or simply enjoying a quiet evening at home, no-bake options provide the perfect solution to satisfying your sweet tooth with minimal effort.
These desserts are particularly appealing during warmer months, where the thought of turning on the oven can feel unbearable. No-bake recipes allow you to keep your kitchen cool while still serving up something that will impress your guests. They are also incredibly versatile; from creamy cheesecakes to fruity parfaits, the possibilities are endless. The convenience factor cannot be overstated; you can prepare these treats in advance, freeing you up to enjoy your time with loved ones rather than being tied to the stove.
Ingredients Overview
To create these No-Bake Banana Split Cheesecake Bars, you’ll need a few key ingredients, each contributing to the overall flavor and texture of the final product. Here’s a closer look at what you’ll need:
For the Crust: The crust sets the foundation for your cheesecake bars. Made with graham cracker crumbs, granulated sugar, and unsalted butter, this mixture creates a flavorful and slightly crunchy base that complements the creamy filling. The graham cracker crumbs provide a subtle sweetness and a signature texture, while the sugar adds an extra layer of flavor. The melted butter binds everything together, ensuring that the crust holds its shape when cut into bars.
For the Cheesecake Filling: The star of the show is undoubtedly the cheesecake filling. Cream cheese is the primary ingredient, lending a rich and creamy texture that is essential for any cheesecake. Combined with sugar, it creates the perfect balance of sweetness and tang. A splash of vanilla extract enhances the flavor, while heavy cream is whipped into soft peaks, making the filling light and airy. Finally, ripe bananas are folded into the mixture, infusing it with natural sweetness and a fruity note that echoes the classic banana split.
For the Topping: To elevate your cheesecake bars, a variety of toppings can be added. Chocolate syrup and strawberry syrup provide a decadent drizzle that mimics the classic sundae toppings. Crushed pineapple adds a tropical twist, offering a burst of freshness that complements the bananas. Maraschino cherries provide a pop of color and a sweet tang, while optional chopped nuts can add a satisfying crunch.
Step-by-Step Instructions
Now that you’re familiar with the ingredients, let’s dive into the preparation process for your No-Bake Banana Split Cheesecake Bars.
Preparing the Crust: Start by gathering your graham cracker crumbs, sugar, and melted unsalted butter. In a mixing bowl, combine the graham cracker crumbs and sugar, stirring until evenly mixed. Slowly pour in the melted butter, mixing until all the crumbs are moistened. The mixture should resemble wet sand.
Next, transfer the crust mixture into a greased baking dish. Using the back of a measuring cup or your fingers, firmly press the mixture into an even layer across the bottom of the dish. This step is crucial; a well-pressed crust will provide stability to your cheesecake bars once they are chilled and cut. Place the crust in the refrigerator to set while you prepare the filling.
Making the Cheesecake Filling: In a large mixing bowl, begin by softening your cream cheese to room temperature. This step is essential for achieving a smooth and lump-free filling. Use a hand mixer or stand mixer to beat the cream cheese until it’s creamy and smooth. Gradually add in the granulated sugar, continuing to mix until well combined. The mixture should be fluffy and light.
Next, add the vanilla extract and mix again until incorporated. In a separate bowl, whip the heavy cream until soft peaks form. Gently fold the whipped cream into the cream cheese mixture, taking care not to deflate the light and airy texture. Once well combined, slice the ripe bananas and fold them into the cheesecake filling, ensuring an even distribution of fruit throughout.
With the crust chilled and the filling ready, you are now prepared to assemble your No-Bake Banana Split Cheesecake Bars. Spread the cheesecake mixture evenly over the prepared crust, smoothing the top with a spatula. It’s important to ensure that the filling is evenly distributed for consistent portions when it’s time to serve.
As you embark on this delicious journey of creating No-Bake Banana Split Cheesecake Bars, you’ll discover not just a recipe, but a delightful experience that celebrates the joy of sweet treats, the simplicity of no-bake cooking, and the timeless appeal of classic flavors. Stay tuned for the next steps, where we’ll cover how to add the finishing touches and serve your delectable dessert!

Whipping the Cream
Whipping heavy cream is a crucial step in achieving the perfect texture for your no-bake banana split cheesecake bars. Start with chilled heavy cream, as cold cream whips better and faster. Pour the heavy cream into a mixing bowl and begin whipping at medium speed. Gradually increase to high speed until soft peaks form. This means that when you lift the whisk or beaters, the cream should hold its shape but still be slightly droopy. For stiff peaks, continue whipping until the cream stands tall and firm, without collapsing.
The significance of this step cannot be overstated. Whipped cream adds lightness and airiness to the cheesecake filling, making it not only creamy but also fluffy. This is particularly important in no-bake recipes where eggs are not used, as the whipped cream provides structure and volume, ensuring that your cheesecake bars have a delightful mouthfeel.
Incorporating the Bananas
Once your cream is whipped to stiff peaks, it’s time to add the bananas. Start by slicing ripe bananas into small pieces. The ripeness of the bananas plays a vital role in the flavor, as overly green bananas can lend an unappealing taste.
With your whipped cream ready, gently fold in the banana slices using a spatula. It’s important to use a folding technique here—this means you should carefully lift and turn the mixture over itself rather than stirring vigorously. This technique helps maintain the airiness of the whipped cream, ensuring that your filling remains light and fluffy. Be cautious not to over-mix, as this can deflate the whipped cream and result in a denser texture.
Assembling the Cheesecake Bars
Once your banana mixture is ready, it’s time to assemble the cheesecake bars. Take your prepared crust from the refrigerator, which should be firm and set by now. Pour the banana cheesecake filling onto the crust, spreading it evenly with a spatula. This step is crucial for ensuring that every bite of your cheesecake bars contains the perfect balance of crust and filling.
After spreading the filling evenly, smooth out the top to create a flat surface. Cover the dish with plastic wrap and place it back in the refrigerator. Allow the cheesecake bars to chill for at least four hours, though overnight is best for achieving a perfectly set texture. The longer they chill, the more the flavors meld, creating a deliciously cohesive dessert.
Decorating the Bars
The decoration is where you can really let your creativity shine. Once the cheesecake bars are set, carefully remove them from the dish. Use a sharp knife to cut them into squares or bars, wiping the knife with a damp cloth between cuts for clean edges.
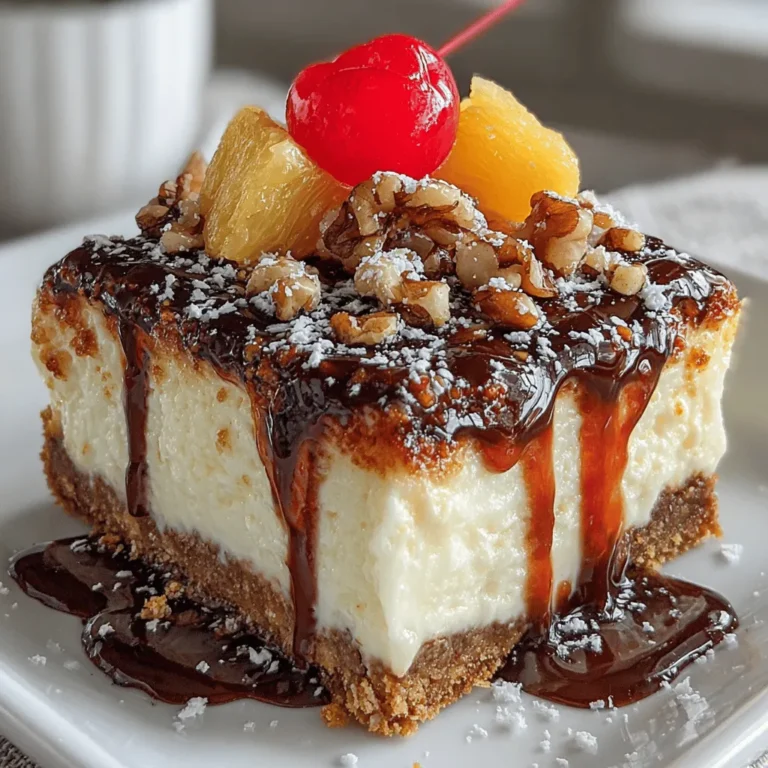
To decorate, consider drizzling chocolate syrup and strawberry syrup over the top of the bars for a classic banana split presentation. You can also add a sprinkle of chopped nuts for a crunchy texture, and finish with a dollop of whipped cream on top for an extra indulgence. Fresh banana slices and maraschino cherries can also be arranged on each piece for an authentic banana split experience.
Serving Suggestions
When it comes time to serve your no-bake banana split cheesecake bars, presentation is key. Arrange the bars on a large platter, and consider garnishing the edges with additional banana slices and nuts, or even some fresh whipped cream. This not only enhances the visual appeal but also invites guests to indulge.
These cheesecake bars are perfect for summer gatherings, potlucks, or as a delightful treat after dinner. They can be served chilled straight from the refrigerator, making them a refreshing option. For an added touch, serve each bar with a scoop of vanilla ice cream on the side, allowing guests to create their own mini banana splits.
Flavor Profile and Texture
The no-bake banana split cheesecake bars offer a delightful explosion of flavors and textures. The creaminess of the cheesecake contrasts beautifully with the sweetness of the chocolate and strawberry syrups, while the tartness of the pineapple adds a refreshing balance. Each bite delivers a perfect combination of rich and fruity flavors that evoke the classic banana split experience.
In terms of texture, the crunchy graham cracker crust and nuts provide a satisfying contrast to the smooth, creamy filling. The whipped cream and banana mixture create a lightness that complements the denser crust, making each bite a harmonious blend of textures. This combination keeps the dessert exciting and ensures that your guests will be coming back for more.
Storage and Shelf Life
To keep your no-bake banana split cheesecake bars fresh, store them in an airtight container in the refrigerator. They will typically last for about 3-5 days, depending on the ripeness of your bananas. It’s best to keep them covered to prevent them from absorbing any odors from the refrigerator.
Avoid freezing these cheesecake bars, as freezing can alter the texture of the whipped cream and lead to a watery filling upon thawing. The bananas may also brown and lose their appealing appearance, detracting from the overall presentation. For optimal flavor and texture, enjoy them fresh from the fridge.
Conclusion
In conclusion, no-bake banana split cheesecake bars are a fun and accessible dessert that can be enjoyed at any occasion. With their creamy filling, crunchy crust, and delightful toppings, these bars encapsulate the joy of classic banana split flavors in a new and exciting format.
Encouraging readers to try making this recipe for their next gathering or as a sweet treat for themselves, these cheesecake bars promise to impress and satisfy. The combination of textures and flavors makes them a versatile dessert that appeals to everyone from kids to adults. So grab your ingredients and start creating this delicious dessert that’s sure to become a favorite!


