Indulge in Oreo Cookie Dough Bliss Bars: A Decadent No-Bake Dessert Recipe
In recent years, no-bake desserts have surged in popularity, captivating home cooks and dessert enthusiasts alike. These treats offer an effortless way to satisfy a sweet tooth without the need for an oven, making them perfect for warm weather gatherings, last-minute parties, or simply as a personal indulgence. Among the myriad of no-bake options, Oreo Cookie Dough Bliss Bars stand out as a particularly delightful creation. This dessert masterfully combines the rich, creamy flavors of traditional cookie dough with the beloved crunch of Oreo cookies, resulting in a treat that is both nostalgic and modern.
Oreo Cookie Dough Bliss Bars are not just a sweet indulgence; they are an experience. With their layered texture that juxtaposes creamy cookie dough and crunchy cookie bits, these bars deliver a satisfying bite every time. The mild sweetness of the cookie dough complements the rich, chocolatey flavor of the Oreos, creating a harmonious blend that appeals to a wide range of palates. Whether you are preparing for a gathering or simply want to treat yourself, these bars are sure to impress.
What makes Oreo Cookie Dough Bliss Bars particularly appealing is their versatility. They can be served at birthday parties, holiday gatherings, or casual family get-togethers. Their eye-catching layers and decadent taste make them a perfect centerpiece on any dessert table. Moreover, they are incredibly easy to prepare, requiring minimal effort while delivering maximum flavor.
Understanding Oreo Cookie Dough Bliss Bars
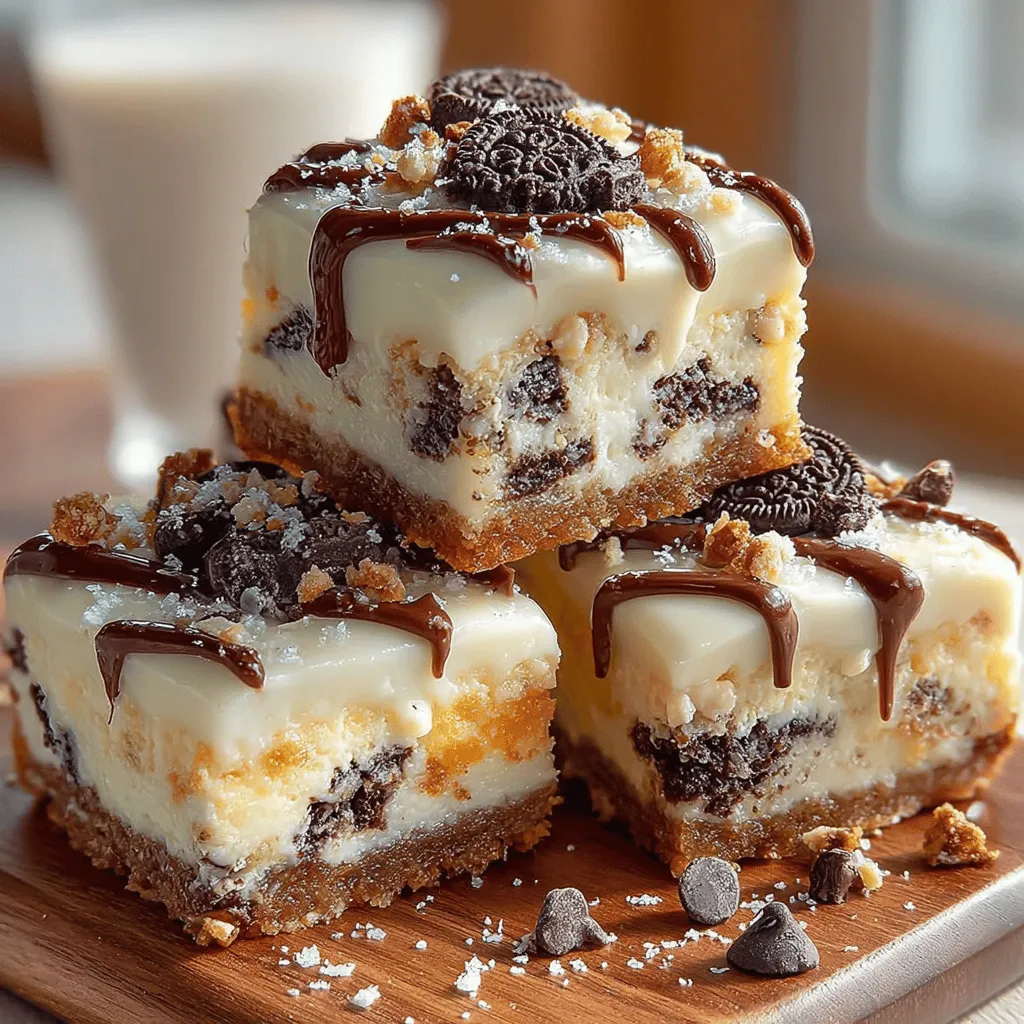
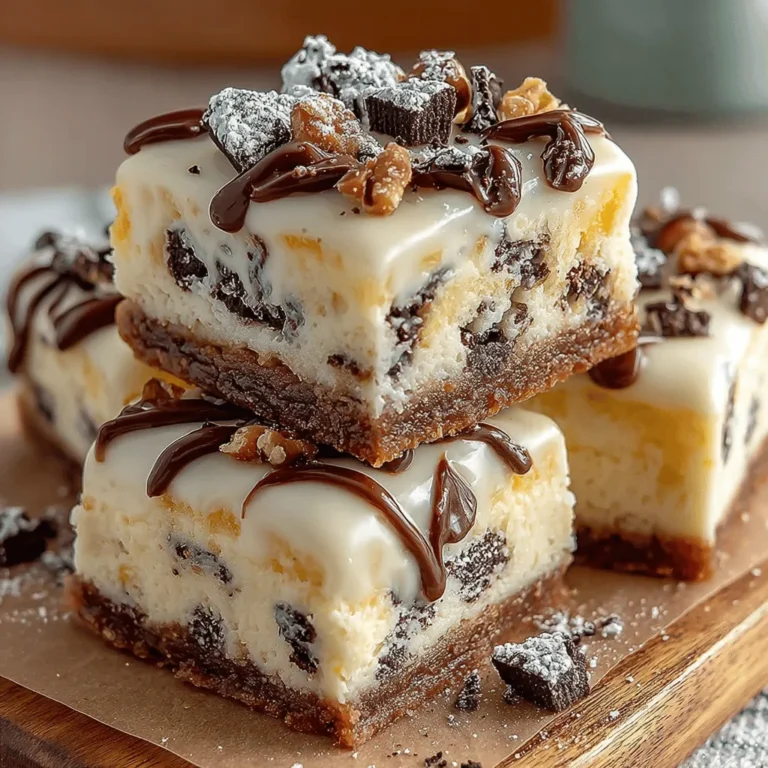
The texture and flavor profile of Oreo Cookie Dough Bliss Bars are what truly set them apart. The bars feature a soft and chewy cookie dough base, studded with crunchy Oreo pieces, which adds a delightful contrast. The creamy topping, made from white chocolate, introduces a smooth richness that rounds out the flavor experience. Each bite is an explosion of chocolatey goodness, enhanced by the buttery, sweet undertones of the cookie dough.
This recipe stands out among other dessert options for several reasons. First, it embraces the beloved Oreo cookie, a staple in many households, and elevates it by pairing it with a cookie dough that is safe to eat raw. Additionally, the no-bake nature of this recipe means that anyone can create this indulgent treat without the fear of overbaking or complicated techniques. It is a straightforward and rewarding dessert that can be prepared in under an hour.
The balance between the chocolatey richness of the Oreos, the creamy texture of the cookie dough, and the crunchy contrast of the cookie pieces makes these bars a sensory delight. Each layer contributes to a well-rounded dessert experience, making them irresistible to both kids and adults alike.
Ingredients Breakdown
To create the perfect Oreo Cookie Dough Bliss Bars, it is essential to use quality ingredients that enhance the flavor and texture of the dessert. Let’s take a closer look at each ingredient involved in this recipe and their roles:
– All-Purpose Flour: This is the foundation of the cookie dough base. It provides structure to the bars, ensuring they hold together while still maintaining a soft and chewy texture. Using the right amount of flour is crucial; too much can lead to a dry result, while too little may prevent the bars from holding their shape.
– Unsalted Butter: The heart of any cookie dough, unsalted butter adds richness and moisture to the bars. It contributes to the overall flavor and helps create that coveted chewy texture. Using unsalted butter allows for better control over the saltiness of the final product, ensuring a perfectly balanced dessert.
– Sugars (Brown and Granulated): A combination of brown and granulated sugars is used to sweeten the cookie dough. Brown sugar adds moisture and a slight caramel flavor due to its molasses content, while granulated sugar contributes to the overall sweetness. This balance creates a cookie dough that is flavorful and satisfying.
– Vanilla Extract: This ingredient is essential for flavor enhancement. Vanilla extract brings warmth and depth to the cookie dough, complementing the chocolate flavors of the Oreos and the sweetness of the sugars.
– Salt: A pinch of salt is crucial in dessert recipes as it helps to balance sweetness and enhance flavors. It can elevate the overall taste profile, making the dessert more complex and enjoyable.
– Mini Chocolate Chips: These little bursts of chocolate add an extra layer of sweetness and richness to each bite. The mini size ensures they are evenly distributed throughout the cookie dough, providing a delightful surprise in every piece.
– Oreo Cookies: The star ingredient of this recipe, Oreos are what give these bars their signature flavor and crunch. The combination of the chocolate wafer and creamy filling creates a nostalgic taste that many people adore.
– White Chocolate Chips and Vegetable Oil: The topping for the bars consists of melted white chocolate chips combined with a small amount of vegetable oil. This mixture creates a smooth, glossy finish that enhances the visual appeal of the dessert while adding a sweet, creamy layer that contrasts beautifully with the chocolate and cookie flavors below.
Step-by-Step Instructions
Now that we have a good understanding of the ingredients and their roles in creating Oreo Cookie Dough Bliss Bars, it’s time to dive into the preparation process. Follow these step-by-step instructions to create this decadent no-bake dessert:
1. Prepare the Pan: Start by lining an 8×8-inch square baking pan with parchment paper. This will make it easier to remove the bars once they are set and will help prevent sticking.
2. Make the Cookie Dough Base: In a large mixing bowl, beat together the unsalted butter and both sugars until the mixture is light and fluffy. This process typically takes about 2-3 minutes.
3. Incorporate Dry Ingredients: Gradually mix in the all-purpose flour and salt until fully combined. It is essential to ensure that the flour is mixed in thoroughly to avoid any clumps.
4. Add Flavor and Texture: Stir in the vanilla extract, mini chocolate chips, and crushed Oreo cookies. Mix until everything is evenly distributed throughout the dough.
5. Press the Mixture into the Pan: Transfer the cookie dough mixture to the prepared baking pan. Use a spatula or your hands to press it down firmly into an even layer. Make sure it is compact to achieve the best texture in the final bars.
6. Prepare the White Chocolate Topping: In a microwave-safe bowl, melt the white chocolate chips with a teaspoon of vegetable oil. Heat in 30-second intervals, stirring in between, until smooth and fully melted.
7. Spread the Topping: Pour the melted white chocolate over the cookie dough layer, spreading it evenly with a spatula. This glossy topping will add a beautiful finish to your bars.
8. Chill and Set: Place the baking pan in the refrigerator for at least 2 hours, or until the bars are firm and set. This chilling time is crucial for the bars to hold their shape when cut.
By following these steps, you are well on your way to creating delicious Oreo Cookie Dough Bliss Bars that will satisfy your sweet cravings and impress your friends and family. Stay tuned for the next part of the article, where we will explore tips for serving, storing, and customizing these delightful treats.

Preparing the Base
To create the perfect base for your Oreo Cookie Dough Bliss Bars, start by ensuring that your butter is softened to room temperature. This step is crucial as it allows for easy mixing, resulting in a creamy mixture. To achieve this, simply leave your butter out for about 30 minutes before you start. In a large mixing bowl, combine the softened butter with the brown sugar and granulated sugar. Using an electric mixer on medium speed, beat the mixture until it becomes light and fluffy, which should take about 2-3 minutes. This step introduces air into the mixture, making your bars light and delicious.
Next, add in the vanilla extract and a pinch of salt to enhance the flavors. Continue to mix until fully incorporated. The key here is to ensure that all the ingredients are blended well, as this will contribute significantly to the overall taste and texture of your bars.
Adding Flavors
Mixing in the flavors is where the magic begins. Gradually add in the flour, ensuring you do not overmix the batter. Overmixing can lead to a dense texture due to gluten development, which is not desirable in a cookie dough base. Instead, mix just until the flour is incorporated. The dough should be soft and slightly sticky, reminiscent of classic cookie dough.
For an added boost of flavor, you can fold in some chocolate chips at this stage. This not only enhances the taste but also adds a delightful texture to each bite. Remember, the secret to a uniform dough is thorough mixing but gentle handling to maintain that cookie dough consistency.
Incorporating Flour
When you reach the step of incorporating flour, be mindful of your mixing technique. Use a spatula or wooden spoon to gently fold the flour into the butter-sugar mixture. This method helps prevent overmixing and keeps your bars from becoming tough. The dough should be cohesive but still retain a soft, slightly crumbly texture.
If you notice any dry flour at the bottom of the bowl, it’s okay to give it a gentle fold or two with the spatula. Aim for a mixture that holds together without being overly sticky. A perfect balance here will yield blissful bars that melt in your mouth.
Folding in Treats
Now comes the fun part—folding in the treats! For the Oreo Cookie Dough Bliss Bars, you’ll want to crush some Oreo cookies into chunks and add them along with extra chocolate chips to the mixture. Using your spatula, fold these ingredients into your dough gently.
Make sure the Oreo chunks and chocolate chips are evenly distributed throughout the dough. This ensures that every bite of your bars will have a delightful crunch and a burst of chocolatey goodness. The key is to be gentle; you want to keep the integrity of the cookie chunks while ensuring they are well incorporated into the dough.
Pressing into the Pan
Once your mixture is ready, it’s time to transfer it to a lined baking dish. Use parchment paper for easy removal later. With your spatula, spread the dough evenly into the pan, pressing it down firmly. It’s important to create a smooth surface to ensure even cutting later on.
For best results, dampen your hands slightly with water to help prevent sticking while you press the dough into the corners of the pan. This technique not only helps achieve a flatter surface but also makes for cleaner edges. Make sure to pack the dough tightly to avoid any crumbling when you slice it later.
Melting the Topping
For the topping, white chocolate is a popular choice, adding a sweet contrast to the rich cookie dough base. To melt your white chocolate perfectly without burning it, use a double boiler method or the microwave. If using the microwave, place the chocolate in a microwave-safe bowl and heat in 30-second intervals, stirring in between until smooth.
Be cautious, as white chocolate can burn quickly. Stirring helps to distribute the heat evenly, ensuring a silky texture without any lumps. Once melted, let it cool slightly before spreading it over the cookie dough base to prevent it from melting the dough underneath.
Spreading the White Chocolate
With your melted white chocolate ready, pour it over the prepared cookie dough base. Using an offset spatula or the back of a spoon, spread the chocolate evenly across the surface. This step is crucial for a visually appealing and delicious topping.
Make sure to cover all edges and corners for a uniform look. If desired, you can sprinkle some additional crushed Oreos on top for decoration, adding a fun crunch and aesthetic appeal.
Chilling
After spreading the white chocolate topping, it’s essential to chill your bars in the refrigerator. This step allows the chocolate to set properly and helps the cookie dough firm up. Cover the pan with plastic wrap or aluminum foil to keep it fresh.
Refrigerate for at least 1-2 hours, or until the topping is firm to the touch. This chilling period not only enhances the flavor but also makes it easier to cut the bars into neat squares.
Slicing and Serving
Once your Oreo Cookie Dough Bliss Bars have chilled and set, it’s time to slice them into squares. For clean cuts, use a sharp knife and run it under hot water before slicing. This technique helps to prevent the topping from cracking and ensures a smooth cut.
Cut the bars into squares or rectangles, depending on your serving preference. These bars are perfect for sharing, making them a great addition to parties, gatherings, or just a sweet treat for yourself.
The Allure of No-Bake Desserts
No-bake desserts have become increasingly popular in the culinary world, and for good reason. They offer a quick and often simpler alternative to traditional baking methods, saving both time and energy. The trend of no-bake recipes has surged, especially among busy individuals looking for delightful treats without the hassle of an oven.
Oreo Cookie Dough Bliss Bars perfectly embody the appeal of no-bake desserts. They can be whipped up in less than an hour, require minimal cooking skills, and deliver an indulgent flavor that satisfies any sweet tooth. This dessert aligns with current trends, marrying simplicity with the rich, beloved flavors of Oreo cookies and chocolate.
Serving Suggestions and Pairings
These bliss bars are incredibly versatile and can be served at various occasions, from birthdays to holiday celebrations or casual get-togethers. They can be presented as a dessert platter centerpiece or individually wrapped for party favors.
Pair your Oreo Cookie Dough Bliss Bars with a glass of cold milk for a classic combination. Alternatively, consider serving them alongside a scoop of vanilla ice cream to elevate the experience. For a more sophisticated touch, a cup of freshly brewed coffee or espresso complements the sweetness beautifully, making it a delightful treat any time of day.
Nutritional Information
While indulgent, it’s essential to enjoy Oreo Cookie Dough Bliss Bars in moderation. Each square is rich in flavors and calories, so keeping portion control in mind is vital for a balanced diet. These bars are a fun treat, but they are best enjoyed as part of an overall healthy lifestyle.
A typical serving may contain around 200 calories, depending on the size and ingredients used. They offer a delightful mix of carbohydrates and fats, making them a satisfying dessert option. However, for those watching their sugar intake or caloric consumption, consider slicing smaller portions or sharing with friends.
Conclusion
Oreo Cookie Dough Bliss Bars are not just a dessert; they are a celebration of flavors and textures that bring joy to dessert lovers everywhere. The combination of cookie dough, Oreos, and a smooth white chocolate topping creates an irresistible treat that’s perfect for any occasion.
This simple yet indulgent recipe invites you to dive into the world of no-bake desserts, proving that deliciousness doesn’t always require extensive preparation or baking. Whether you’re enjoying these bars at a gathering or savoring them at home, they are sure to bring a smile to your face.
So, go ahead and try this delightful recipe for a taste of bliss! You’ll find that these bars are not only easy to make but also a delightful addition to your dessert repertoire, perfect for both everyday treats and special occasions alike.


